이 글은 Finetuning Large Language Models 코스를 보고 정리한 글입니다.
Course Agenda:
- Why fine-tuning
- Where fine-tuning fits in
- instruction fine-tuning
- data preparation
- training process
- Evaluation and Iteration
- Consideration on getting started now
- Conclusion
1. Why fine-tuning
3가지 요소를 꼽는다:
- Steers the model to more consistent outputs
- Reduce hallucinations
- Customizes the model to a specific usecase
Prompt-engineering vs Fine-tuning
- 쉽게 설명하자면 프롬포트 엔지니어링은 쉽고 접근서잉 좋다.
- 파인튜닝은 데이터가 필요하고, 추가적인 학습이 들어가긴 하지만 더 해당 작업을 잘하게 됨.
| 항목 | Prompting | Finetuning |
|---|---|---|
| Pros | - No data to get started | - Nearly unlimited data fits |
| - Smaller upfront cost | - Learn new information | |
| - No technical knowledge needed | - Correct incorrect information | |
| - Connect data through retrieval (RAG) | - Less cost afterwards if smaller model | |
| - Use RAG too | ||
| Cons | - Much less data fits | - More high-quality data |
| - Forgets data | - Upfront compute cost | |
| - Hallucinations | - Needs some technical knowledge, esp. data | |
| - RAG misses, or gets incorrect data | ||
| Usage | Generic, side projects, prototypes | Domain-specific, enterprise, production usage, ...privacy! |
파인 튜닝 모델과 파인튜닝 하지 않은 모델을 비교하는 실습 코드:
- lamini 는 Python 라이브러리로 LLM 을 훈련하고 배포시키는데 도움을 주는 라이브러리임.
- llama 는 메타에서 만든 라이브러리로 자연어 처리를 위한 모델을 가져올 수 있음.
- BasicModelRunner 는 모델을 초기화 하고 가져올 수 있는 역할을 함.
import os
import lamini

lamini.api_url = os.getenv("POWERML__PRODUCTION__URL")
lamini.api_key = os.getenv("POWERML__PRODUCTION__KEY")

from llama import BasicModelRunner
파인튜닝 되지 않은 모델을 실행시켜보면 유용하지 않은 대답을 하게될 수 있다.
non_finetuned = BasicModelRunner("meta-llama/Llama-2-7b-hf")
non_finetuned_output = non_finetuned("Tell me how to train my dog to sit")
print(non_finetuned_output)
출력:
Tell me how to train my dog to sit.
I have a 10 month old puppy and I want to train him to sit.
I have tried the treat method and the verbal command method.
I have tried both and he just doesn't seem to get it.
I have tried to get him to sit by putting my hand on his back and pushing him down.
I have tried to get him to sit by putting my hand on his back and pushing him down.
I have tried to get him to sit by putting my hand on his back and pushing him down.
I have tried to get him to sit by putting my hand on his back and pushing him down.
I have tried to get him to sit by putting my hand on his back and pushing him down.
I have tried to get him to sit by putting my hand on his back and pushing him down.
I have tried to get him to sit by putting my hand on his back and pushing him down.
I have tried to get him to sit by putting my hand on his back and pushing him down.
I have tried to get him to sit by putting my hand on his back and pushing him down.
I have tried to get him to sit by putting my hand on his back and pushing him down.
I have tried to get him to sit by putting my hand on his back and pushing him down.
I have tried to get him to sit by putting my hand on his back and pushing him down.
...
이제는 파인튜닝된 모델을 가져와서 어떻게 응답하는지 보자:
- meta-llama/Llama-2-7b-chat-hf 이 모델은 llama2 를 대화나 채팅 용도로 파인 튜닝을 한거임.
- 기본 Llama2 는 Autoregressive Training 을 한거임 이건 모델이 주어진 단어 시퀀스에서 다음 단어를 예측하도록 하는 방법이다.
finetuned_model = BasicModelRunner("meta-llama/Llama-2-7b-chat-hf")
finetuned_output = finetuned_model("Tell me how to train my dog to sit")
print(finetuned_output)
출력은 다음과 같다:
Training a dog to sit on command is a basic obedience command that can be achieved with patience, consistency, and positive reinforcement. Here's a step-by-step guide on how to train your dog to sit on command:

1. Choose a quiet and distraction-free area: Find a quiet area with minimal distractions where your dog can focus on you.
2. Have treats ready: Choose your dog's favorite treats and have them ready to use as rewards.
3. Stand in front of your dog: Stand in front of your dog and hold a treat close to their nose.
4. Move the treat up and back: Slowly move the treat up and back, towards your dog's tail, while saying "sit" in a calm and clear voice.
5. Dog will sit: As you move the treat, your dog will naturally sit down to follow the treat. The moment their bottom touches the ground, say "good sit" and give them the treat.
6. Repeat the process: Repeat steps 3-5 several times, so your dog starts to associate the command "sit" with the action of sitting down.
7. Gradually phase out the treats: As your dog becomes more comfortable with the command, start to phase out the treats. Instead, use praise and affection as rewards.
8. Practice, practice, practice: Practice the "sit" command in different locations, with different distractions, and at different times of the day. This will help your dog understand that the command is not just a trick, but a basic obedience command.
9. Be consistent: Consistency is key when training a dog. Make sure everyone in the household is using the same command and reward system.
10. Be patient: Training a dog takes time and patience. Don't get frustrated if your dog doesn't pick up the command immediately. Keep practicing and eventually, your dog will learn.

Remember, training a dog is a journey, and it's important to be patient, consistent, and positive. With time and practice, your dog will learn to sit on command and other basic obedience commands.
2. Where fine-tuning fits in
Pre-training 에 대해서 먼저 알아보자:
- 막대한 텍스트 데이터를 가지고 학습을 함.
- 이때의 모델은 언어에 대한 어떠한 지식도 없음. 그리고 그냥 훈련할 때는 다음 단어를 예측하는 걸로 학습을 함. (이게 가장 일반적인 학습 방법이다)
- 이렇게 학습이 끝나고 난다면 일반적인 지식이나, 언어 스킬을 얻게되는거임.
Fine-tuning 의 효과는 크게 두 가지임:
- Behavior change: 말을 더 잘하게 만드는 걸 말한다. (명료하게, 과도하게 지나치치 않게 더)
- Gain Knowledge
파인 튜닝은 크게 두 종류의 작업 방식으로 나뉠 수 있음:
- 추출 (Extraction): 긴 텍스트 입력에서 더 짧은 텍스트 출력을 생성하는 작업을 말한다. 주로 긴 문서나 텍스트에서 중요한 정보를 추출하거나 요약하는 데 사용됨
- 확장 (Expansion): 텍스트 입력을 받아서 더 긴 텍스트 출력을 생성하는 작업을 말한다. 주로 창의적인 텍스트 생성이나 상세한 설명이 필요한 경우에 사용됨.
파인튜닝을 하려면 어떠한 작업을 원하는지, 그리고 어떤 응답이 좋은건지/나쁜건지 등에 대해서 명확히 알고해야함.
그리고 파인튜닝을 하려면 1000개 정도의 데이터셋은 모우는게 좋다. 이정도가 좋다고 함.
실습: 파인튜닝 데이터셋과 Pre-training 데이터셋을 비교해보자
- datasets: Hugging Face의 데이터셋 라이브러리로, 다양한 공개 데이터셋을 쉽게 로드하고 사용할 수 있게 해줌.
- 데이터셋을 로딩할 때 streaming=True: 데이터셋을 스트리밍 모드로 로드하여 메모리 사용을 최소화한다. 이렇게 하면 전체 데이터셋을 한번에 가져오지 않고 필요한 만큼만 데이터를 스트리밍으로 처리한다.
import jsonlines
import itertools
import pandas as pd
from pprint import pprint

import datasets
from datasets import load_dataset

pretrained_dataset = load_dataset("c4", "en", split="train", streaming=True)

n = 5
print("Pretrained dataset:")
top_n = itertools.islice(pretrained_dataset, n)
for i in top_n:
  print(i)
Pre-training 의 데이터셋은 다음과 같다. 그냥 텍스트 덩어리임
Pretrained dataset:
{'text': 'Beginners BBQ Class Taking Place in Missoula!\nDo you want to get better at making delicious BBQ? You will have the opportunity, put this on your calendar now. Thursday, September 22nd join World Class BBQ Champion, Tony Balay from Lonestar Smoke Rangers. He will be teaching a beginner level class for everyone who wants to get better with their culinary skills.\nHe will teach you everything you need to know to compete in a KCBS BBQ competition, including techniques, recipes, timelines, meat selection and trimming, plus smoker and fire information.\nThe cost to be in the class is $35 per person, and for spectators it is free. Included in the cost will be either a t-shirt or apron and you will be tasting samples of each meat that is prepared.', 'timestamp': '2019-04-25T12:57:54Z', 'url': 'https://klyq.com/beginners-bbq-class-taking-place-in-missoula/'}
...
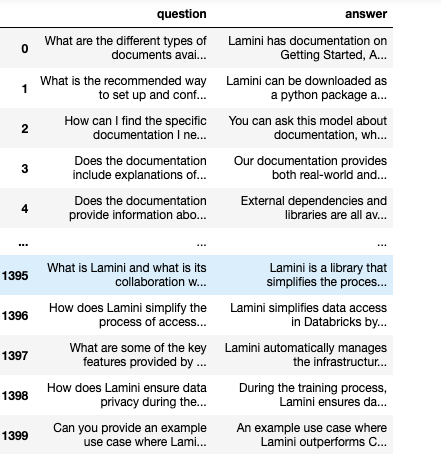
파인튜닝의 데이터셋은 원하는 레이블을 포함하게 될거다
filename = "lamini_docs.jsonl"
instruction_dataset_df = pd.read_json(filename, lines=True)
instruction_dataset_df
파인튜닝 데이터셋 표현:
여기서 프롬포트 템플릿을 이용해서 파인튜닝할 언어 모델에게 어떻게 물어볼건지 응답을 형식화하고 레이블을 만들 수 있음.
prompt_template_qa = """### Question:
{question}

### Answer:
{answer}"""

prompt_template_q = """### Question:
{question}

### Answer:"""
그리고 플레이스 홀더에 데이터를 담아서 파인튜닝을 위한 데이터셋을 준비하면 된다. (원하는 방식으로 준비하면 됨.)
num_examples = len(examples["question"])
finetuning_dataset_text_only = []
finetuning_dataset_question_answer = []
for i in range(num_examples):
  question = examples["question"][i]
  answer = examples["answer"][i]

  text_with_prompt_template_qa = prompt_template_qa.format(question=question, answer=answer)
  finetuning_dataset_text_only.append({"text": text_with_prompt_template_qa})

  text_with_prompt_template_q = prompt_template_q.format(question=question)
  finetuning_dataset_question_answer.append({"question": text_with_prompt_template_q, "answer": answer})

pprint(finetuning_dataset_text_only[0])
pprint(finetuning_dataset_question_answer[0])
출력:
{'text': '### Question:\n'
         'What are the different types of documents available in the '
         "repository (e.g., installation guide, API documentation, developer's "
         'guide)?\n'
         '\n'
         '### Answer:\n'
         'Lamini has documentation on Getting Started, Authentication, '
         'Question Answer Model, Python Library, Batching, Error Handling, '
         'Advanced topics, and class documentation on LLM Engine available at '
         'https://lamini-ai.github.io/.'}

{'answer': 'Lamini has documentation on Getting Started, Authentication, '
           'Question Answer Model, Python Library, Batching, Error Handling, '
           'Advanced topics, and class documentation on LLM Engine available '
           'at https://lamini-ai.github.io/.',
 'question': '### Question:\n'
             'What are the different types of documents available in the '
             'repository (e.g., installation guide, API documentation, '
             "developer's guide)?\n"
             '\n'
             '### Answer:'}
그리고 이를 저장해서 파일로 가지고 있으면 된다.
with jsonlines.open(f'lamini_docs_processed.jsonl', 'w') as writer:
    writer.write_all(finetuning_dataset_question_answer)
데이터를 로드할 떈 이렇게 하면 됨
finetuning_dataset_name = "lamini/lamini_docs"
finetuning_dataset = load_dataset(finetuning_dataset_name)
3. instruction fine-tuning
Instruction Fine-tuning 은 파인튜닝 기법의 일종임. GPT-3 언어 모델이 ChatGPT 가 된 것도 이 기법을 사용했다고 함.
Instruction Fine-tuning 을 위해서는 Instruction-following Datasets 을 준비해야한다:
- 이 데이터 셋은 Instruction 을 포함한 Input 과 Output 이 쌍으로 이뤄진 데이터셋을 말함.
- 이런 데이터 셋으로 학습을 해야지 주어진 명령과 Input 에 따라서 잘 대답하기 때문임.
실제로 이렇게 구성된 데이터셋이 있으면 좋겠지만, 없을 수도 있다. 그렇다고 걱정할 필요는 없음. Standford 에서 발표한 Alpaca 기법을 이용하면 된다.
- ChatGPT 3.5 다른 LLM 들을 이용해서 Instruction-following Datasets 을 만드는 걸 말함.
- 예시로 들자면 README 파일을 읽어서 Question- Answer 로 이뤄진 데이터 셋을 만드는거지.
Instruction Fine-tuning 을 잘 헀을 경우에는 모델이 파인튜닝에서 보지 못한 데이터를 줘도 일반화를 잘 해서 대답할 수 있기 때문에 좋다고 함:
- Catastrophic forgetting 문제가 잘 안일어나게 잘 해야할듯. 필요하다먼 여러 Task 에 대한 Instruction fine-tuning 을 하기도 하고.
Instrurction fine-tuning 의 과정은 Model 훈련과 비슷함. Data preparation, Training, Evaluation 이렇게 3가지 큰 과정이 있는데 이 중에서 Data preparation 만 잘 하면 된다. 이전에 말했듯이 Instruction-following Datasets 을 잘 준비하면 됨.
이 실습에서는 Instruction Fine-tuning 을 한 모델과 그렇지 않은 모델의 성능을 비교해보는 실습임
Instruction dataset 을 불러오는 코드:
import itertools
import jsonlines

from datasets import load_dataset
from pprint import pprint

from llama import BasicModelRunner
from transformers import AutoTokenizer, AutoModelForCausalLM
from transformers import AutoModelForSeq2SeqLM, AutoTokenizer

instruction_tuned_dataset = load_dataset("tatsu-lab/alpaca", split="train", streaming=True)

m = 5
print("Instruction-tuned dataset:")
top_m = list(itertools.islice(instruction_tuned_dataset, m))
for j in top_m:
  print(j)
출력은 다음과 같다:
- 데이터셋이 instruction, input, output 으로 구조화되어 있다는 점을 주목해야함.
Instruction-tuned dataset:
{'instruction': 'Give three tips for staying healthy.', 'input': '', 'output': '1.Eat a balanced diet and make sure to include plenty of fruits and vegetables. \n2. Exercise regularly to keep your body active and strong. \n3. Get enough sleep and maintain a consistent sleep schedule.', 'text': 'Below is an instruction that describes a task. Write a response that appropriately completes the request.\n\n### Instruction:\nGive three tips for staying healthy.\n\n### Response:\n1.Eat a balanced diet and make sure to include plenty of fruits and vegetables. \n2. Exercise regularly to keep your body active and strong. \n3. Get enough sleep and maintain a consistent sleep schedule.'}
여러 명령에 잘 대답하기 위해, 여러 테스크에 잘 대답하기 위해서 필요하다면 어러 프롬포트 템플릿을 쓰는 것도 방법이다.
prompt_template_with_input = """Below is an instruction that describes a task, paired with an input that provides further context. Write a response that appropriately completes the request.

### Instruction:
{instruction}

### Input:
{input}

### Response:"""

prompt_template_without_input = """Below is an instruction that describes a task. Write a response that appropriately completes the request.

### Instruction:
{instruction}

### Response:"""
프롬포트를 이용해서 데이터를 생성하는 과정의 코드:
processed_data = []
for j in top_m:
  if not j["input"]:
    processed_prompt = prompt_template_without_input.format(instruction=j["instruction"])
  else:
    processed_prompt = prompt_template_with_input.format(instruction=j["instruction"], input=j["input"])

  processed_data.append({"input": processed_prompt, "output": j["output"]})

pprint(processed_data[0])
출력:
{'input': 'Below is an instruction that describes a task. Write a response '
          'that appropriately completes the request.\n'
          '\n'
          '### Instruction:\n'
          'Give three tips for staying healthy.\n'
          '\n'
          '### Response:',
 'output': '1.Eat a balanced diet and make sure to include plenty of fruits '
           'and vegetables. \n'
           '2. Exercise regularly to keep your body active and strong. \n'
           '3. Get enough sleep and maintain a consistent sleep schedule.'}
이렇게 만든 데이터는 JSON 파일로 저장해서 사용하면 편리함:
with jsonlines.open(f'alpaca_processed.jsonl', 'w') as writer:
    writer.write_all(processed_data)

dataset_path_hf = "lamini/alpaca"
dataset_hf = load_dataset(dataset_path_hf)
print(dataset_hf)
작은 모델을 이용해서 추론을 하게 만들려면 다음 코드를 이용해야 할 것.
- 실제 모델이 Completion 을 내뱉으려면 Tokenize 과정과 Generate 과정 그리고 Decode 과정이 필요하다.
def inference(text, model, tokenizer, max_input_tokens=1000, max_output_tokens=100):
  # Tokenize
  input_ids = tokenizer.encode(
          text,
          return_tensors="pt",
          truncation=True,
          max_length=max_input_tokens
  )

  # Generate
  device = model.device
  generated_tokens_with_prompt = model.generate(
    input_ids=input_ids.to(device),
    max_length=max_output_tokens
  )

  # Decode
  generated_text_with_prompt = tokenizer.batch_decode(generated_tokens_with_prompt, skip_special_tokens=True)

  # Strip the prompt
  generated_text_answer = generated_text_with_prompt[0][len(text):]

  return generated_text_answer
Instruction fine-tuning 한 모델과 그렇지 않은 모델을 실제 inference 함수를 이용해서 추론을 시켜보는 코드 (+ 데이터셋 로드도 포함)
tokenizer = AutoTokenizer.from_pretrained("EleutherAI/pythia-70m")
model = AutoModelForCausalLM.from_pretrained("EleutherAI/pythia-70m")
instruction_model = AutoModelForCausalLM.from_pretrained("lamini/lamini_docs_finetuned")

finetuning_dataset_path = "lamini/lamini_docs"
finetuning_dataset = load_dataset(finetuning_dataset_path)
print(finetuning_dataset)

test_sample = finetuning_dataset["test"][0]
print(test_sample)

print(inference(test_sample["question"], model, tokenizer))
print(inference(test_sample["question"], instruction_model, tokenizer))
4. data preparation
Fine-tuning 을 위해서 어떠한 데이터들을 가져오는게 중요할까?
- Lower Quality 데이터 보다는 High Quality 데이터가 중요하다. 이 데이터를 바탕으로 LLM 이 대답을 할거니까.
- 그리고 다양한 데이터 셋을 포함하는게 중요하고, 데이터의 양도 중요하다.
- 그리고 임의로 만들어진 데이터들 보다는 Real 데이터가 더 좋다. 임의로 만들어진 데이터는 어떠한 패턴이 있기 때문에 Real 데이터가 더 효과적일거임.
데이터를 Fine-tuning 에서 사용하기 위해서 처리하는 과정은 다음과 같을거임:
-
- Collect Instruction-response pairs: 그러니까 Input 과 Output 으로 된 데이터 쌍을 준비해야한다는 거임. 이걸 통해서 명령을 기반으로 어떠한 행동을 LLM 이 해야하는지 알거니까.
-
- Concatenate pairs: 이 Pair 로 된 데이터들을 하나로 합쳐서 일관된 형식으로 데이터를 만드는거임. 일관된 형식은 모델이 학습을 하기 더 쉬울것.
-
- Tokenize (Pad, Truncate: 이후 실습에서 자세히 살펴보겠지만 Tokenizing 을 해야지 LLM 의 입력으로 데이터를 공급할 수 있다. 텍스트는 사람이 아는 데이터임. 언어 모델이 알려면 이걸 숫자로 변경해줘야함.
-
- Split into train/test: 데이터를 테스트 용과 훈련용으로 구별시켜줘야함.
Tokenizing 에 대해 좀 더 자세하게:
- 이거는 이제 자주 사용되는 문자열을 숫자로 변환시켜주는 걸 말함. 이렇게 해줘야지 언어모델과 컴퓨터는 텍스트를 이해할거임.
- 단어로 Tokenizing 을 하지 않는다는 점도 알아야함. 단어로 하는 것보다 자주 사용되는 문자열로 하는게 더 공간이 효율적임.
- 그리고 주의할 게 언어 모델이 Pre-training 에 사용한 Tokenizer 와 Fine-tuning 에 사용하는 Tokenizer 는 같은걸로 사용하는게 중요하다. 그래야 텍스트 -> 숫자 로 변환하는 과정을 헷갈리지 않음.

이제 실제로 Tokenizer 과정과 데이터를 준비하는 과정의 실습 코드에 대해서 보자.
다음은 AutoTokenizer 를 통해 토크나이저를 가져오는 코드임. 이 코드가 멋진 이유는 모델 이름을 입력하기만 하면 그것과 관련된 토크나이저를 알아서 잘 가져온다.
import pandas as pd
import datasets

from pprint import pprint
from transformers import AutoTokenizer

tokenizer = AutoTokenizer.from_pretrained("EleutherAI/pythia-70m")
다음은 Tokenizer 를 통해 encoding 하는 코드임. 인코딩하면 이렇게 숫자 배열로 표현됨.
text = "Hi, how are you?"

encoded_text = tokenizer(text)["input_ids"]

encoded_text
출력:
[12764, 13, 849, 403, 368, 32]
인코딩 된 숫자를 디코딩하면 다시 원래대로 돌아옴
decoded_text = tokenizer.decode(encoded_text)
print("Decoded tokens back into text: ", decoded_text)
출력:
Decoded tokens back into text: Hi, how are you?
여러 문자열을 토크나이징 하면 결과는 이렇게 출력될거임. 중요한 건 인코딩 된 숫자 문자열의 길이가 다름.
list_texts = ["Hi, how are you?", "I'm good", "Yes"]
encoded_texts = tokenizer(list_texts)
print("Encoded several texts: ", encoded_texts["input_ids"])
출력:
Encoded several texts: [[12764, 13, 849, 403, 368, 32], [42, 1353, 1175], [4374]]
토크나이징 할 때 padding 을 줘서 토큰의 길이를 일관되게 맞추는게 중요함.
- LLM 을 학습시킬 때 배치로 주게 될텐데 동일한 길이의 배치로 줘야하기 때문임.
- 이렇게 동일한 길이로 주면 GPU 가 한번에 처리할 수 있고, 병렬 처리하기도 쉽기 때문임.
tokenizer.pad_token = tokenizer.eos_token
encoded_texts_longest = tokenizer(list_texts, padding=True)
print("Using padding: ", encoded_texts_longest["input_ids"])
출력:
Using padding: [[12764, 13, 849, 403, 368, 32], [42, 1353, 1175, 0, 0, 0], [4374, 0, 0, 0, 0, 0]]
그리고 LLM 에게 입력할 때 고정된 길이의 입력으로 주기 위해서 Truncatation 해야함. LLM 은 입력 길이 제한이 있기 때문에 이렇게 해야한다.
- Truncatation 은 일반적으로 오른쪾을 기준으로 잘림.
encoded_texts_truncation = tokenizer(list_texts, max_length=3, truncation=True)
print("Using truncation: ", encoded_texts_truncation["input_ids"])
출력:
Using truncation: [[12764, 13, 849], [42, 1353, 1175], [4374]]
만약 Truncataion 이 왼쪽 기준으로 잘리려면 이렇게 설정하면 됨.
tokenizer.truncation_side = "left"
encoded_texts_truncation_left = tokenizer(list_texts, max_length=3, truncation=True)
print("Using left-side truncation: ", encoded_texts_truncation_left["input_ids"])
출력:
Using left-side truncation: [[403, 368, 32], [42, 1353, 1175], [4374]]
다음은 이제 이전에 살펴본 코드인데, Dataset 을 로딩해주고, 파인튜닝에 사용할 수 있도록 Prompt Template 을 이용해서 데이터를 일관된 형식으로 변환하는거임.
import pandas as pd

filename = "lamini_docs.jsonl"
instruction_dataset_df = pd.read_json(filename, lines=True)
examples = instruction_dataset_df.to_dict()

if "question" in examples and "answer" in examples:
  text = examples["question"][0] + examples["answer"][0]
elif "instruction" in examples and "response" in examples:
  text = examples["instruction"][0] + examples["response"][0]
elif "input" in examples and "output" in examples:
  text = examples["input"][0] + examples["output"][0]
else:
  text = examples["text"][0]

prompt_template = """### Question:
{question}

### Answer:"""

num_examples = len(examples["question"])
finetuning_dataset = []
for i in range(num_examples):
  question = examples["question"][i]
  answer = examples["answer"][i]
  text_with_prompt_template = prompt_template.format(question=question)
  finetuning_dataset.append({"question": text_with_prompt_template, "answer": answer})

from pprint import pprint
print("One datapoint in the finetuning dataset:")
pprint(finetuning_dataset[0])
출력:
One datapoint in the finetuning dataset:
{'answer': 'Lamini has documentation on Getting Started, Authentication, '
           'Question Answer Model, Python Library, Batching, Error Handling, '
           'Advanced topics, and class documentation on LLM Engine available '
           'at https://lamini-ai.github.io/.',
 'question': '### Question:\n'
             'What are the different types of documents available in the '
             'repository (e.g., installation guide, API documentation, '
             "developer's guide)?\n"
             '\n'
             '### Answer:'}
실제 입력은 이렇게 들어갈 거임:
text = finetuning_dataset[0]["question"] + finetuning_dataset[0]["answer"]
tokenized_inputs = tokenizer(
    text,
    return_tensors="np",
    padding=True
)

max_length = 2048
max_length = min(
    tokenized_inputs["input_ids"].shape[1],
    max_length,
)

tokenized_inputs = tokenizer(
    text,
    return_tensors="np",
    truncation=True,
    max_length=max_length
)

tokenized_inputs["input_ids"]
정리하면 Tokenizer Function 예시는 다음과 같음:
- 답변 부분이 잘리면 안되니까
tokenizer.truncation_side = "left"로 한거임. - 이 tokenize_function 으로 fine-tuning 을 할건데 output 부분은 기본적으로 데이터가 없고 형식만 갖춰질거임. 그러니까 output: 이런식으로만 표현될거임. 이렇게 템플릿 형식만 갖춰진 형태로 표현하면 모델이 이 패턴으로 생성되도록 유도할 수 있음.
def tokenize_function(examples):
    if "question" in examples and "answer" in examples:
      text = examples["question"][0] + examples["answer"][0]
    elif "input" in examples and "output" in examples:
      text = examples["input"][0] + examples["output"][0]
    else:
      text = examples["text"][0]

    tokenizer.pad_token = tokenizer.eos_token
    tokenized_inputs = tokenizer(
        text,
        return_tensors="np",
        padding=True,
    )

    max_length = min(
        tokenized_inputs["input_ids"].shape[1],
        2048
    )
    tokenizer.truncation_side = "left"
    tokenized_inputs = tokenizer(
        text,
        return_tensors="np",
        truncation=True,
        max_length=max_length
    )

    return tokenized_inputs
데이터를 로드해서 tokenizing 을 통해서 변환하는 함수는 다음과 같음:
- 마지막 배치의 경우에는 길이가 안 맞을 확률이 있으니 drop_last_batch=True 를 통해서 그냥 버리도록 함.
finetuning_dataset_loaded = datasets.load_dataset("json", data_files=filename, split="train")

tokenized_dataset = finetuning_dataset_loaded.map(
    tokenize_function,
    batched=True,
    batch_size=1,
    drop_last_batch=True
)

print(tokenized_dataset)
다음 텍스트를 예측하는 작업인 경우에는 정답을 나타내는 label 에다가 현재 input 텍스트를 붙혀ㄴ둔다.
tokenized_dataset = tokenized_dataset.add_column("labels", tokenized_dataset["input_ids"])
이제 데이터가 준비되었으면 해당 데이터를 잘라서 테스트용과 학습용을 분리함
split_dataset = tokenized_dataset.train_test_split(test_size=0.1, shuffle=True, seed=123)
print(split_dataset)
출력 결과:
DatasetDict({
    train: Dataset({
        features: ['question', 'answer', 'input_ids', 'attention_mask', 'labels'],
        num_rows: 1260
    })
    test: Dataset({
        features: ['question', 'answer', 'input_ids', 'attention_mask', 'labels'],
        num_rows: 140
    })
})
5. Training process
파인튜닝에서 훈련시키는 과정은 기존의 모델 훈련과 동일한 과정임:
for epoch in range(num_epochs):
    for batch in train_dataloader:
        output = model(**batch)
        loss = output.loss
        loss.backward()
        optimizer.step()
Huggingface 의 Transformer 를 이용하거나, Lamini 를 이용하면 훨씬 더 간단하게 훈련 코드를 작성할 수 있다고 함:
Transformer 를 기준으로 훈련하는 경우:
from transformers import pipeline, Trainer, TrainingArguments, AutoModelForSequenceClassification, AutoTokenizer

# 모델과 토크나이저 불러오기
model_name = "bert-base-uncased"
model = AutoModelForSequenceClassification.from_pretrained(model_name)
tokenizer = AutoTokenizer.from_pretrained(model_name)

# 데이터셋 준비
train_dataset = ...
eval_dataset = ...

# TrainingArguments 설정
training_args = TrainingArguments(
    output_dir='./results',
    num_train_epochs=3,
    per_device_train_batch_size=16,
    per_device_eval_batch_size=16,
    warmup_steps=500,
    weight_decay=0.01,
    logging_dir='./logs',
)

# Trainer 초기화
trainer = Trainer(
    model=model,
    args=training_args,
    train_dataset=train_dataset,
    eval_dataset=eval_dataset,
)

# 학습 시작
trainer.train()
Lamini 를 이용하는 경우:
from llama import BasicModelRunner

# 1. choose base model
model = BasicModelRunner("EleutherAI/pythia-410m")

# 2. Load data
model.load_data_from_jsonlines("lamini_docs.jsonl")

# 3. Train it. Returns a model ID, dashboard, and playground interface
model.train()
Lamini 는 기업을 위해서 LLM 모델을 쉽게 훈련시킬 수 있도록 하는 도구임:
- Fine-tuning 이나 RLHF 를 쉽게 할 수 있도록 해준다.
실전 코드를 보면서 어떻게 파인튜닝 학습 코드가 이뤄지는지 확인해보자.
관련 라이브러리 import 하는 코드:
import datasets
import tempfile
import logging
import random
import config
import os
import yaml
import time
import torch
import transformers
import pandas as pd
import jsonlines

from utilities import *
from transformers import AutoTokenizer
from transformers import AutoModelForCausalLM
from transformers import TrainingArguments
from transformers import AutoModelForCausalLM
from llama import BasicModelRunner


logger = logging.getLogger(__name__)
global_config = None
관련 데이터셋을 가져오는 코드. hugging face 에서 가져올거라면 use_hf=True 로 설정하면 된다. 반면 로컬 파일 시스템에서 데이터를 로드할거라면 use_hf=False 로 설정하면 됨
dataset_name = "lamini_docs.jsonl"
dataset_path = f"/content/{dataset_name}"
use_hf = False

# or

dataset_path = "lamini/lamini_docs"
use_hf = True
Model 이름과 training_config 설정과 tokenizer 를 가져오는 코드
model_name = "EleutherAI/pythia-70m"

training_config = {
    "model": {
        "pretrained_name": model_name,
        "max_length" : 2048
    },
    "datasets": {
        "use_hf": use_hf,
        "path": dataset_path
    },
    "verbose": True
}

tokenizer = AutoTokenizer.from_pretrained(model_name)
tokenizer.pad_token = tokenizer.eos_token
train_dataset, test_dataset = tokenize_and_split_data(training_config, tokenizer)

print(train_dataset)
print(test_dataset)
Model 을 가져오고 CUDA GPU 를 사용하는 코드
- torch.cuda.device_count() 를 통해서 사용 가능한 GPU 수를 확인한다.
- GPU가 하나 이상 있으면 torch.device("cuda")로 GPU 장치를 이용하도록 하고, 아니면 CPU 를 이용하도록 한다.
- base_model.to(device) 를 통해서 모델을 GPU 또는 CPU 장치로 이동시킨다는 코드임. GPU 가 선택되면 모든 텐서들이 GPU 메모리로 이동하게 된다.
base_model = AutoModelForCausalLM.from_pretrained(model_name)

device_count = torch.cuda.device_count()
if device_count > 0:
    logger.debug("Select GPU device")
    device = torch.device("cuda")
else:
    logger.debug("Select CPU device")
    device = torch.device("cpu")

base_model.to(device)
추론하는 메소드 선언하는 코드
def inference(text, model, tokenizer, max_input_tokens=1000, max_output_tokens=100):
  # Tokenize
  input_ids = tokenizer.encode(
          text,
          return_tensors="pt",
          truncation=True,
          max_length=max_input_tokens
  )

  # Generate
  device = model.device
  generated_tokens_with_prompt = model.generate(
    input_ids=input_ids.to(device),
    max_length=max_output_tokens
  )

  # Decode
  generated_text_with_prompt = tokenizer.batch_decode(generated_tokens_with_prompt, skip_special_tokens=True)

  # Strip the prompt
  generated_text_answer = generated_text_with_prompt[0][len(text):]

  return generated_text_answer
Base Model 의 현재 성능을 확인하는 코드:
test_text = test_dataset[0]['question']
print("Question input (test):", test_text)
print(f"Correct answer from Lamini docs: {test_dataset[0]['answer']}")
print("Model's answer: ")
print(inference(test_text, base_model, tokenizer))
Training 을 실제로 해보는 코드:
- max_steps = 3 으로 설정해서 엄청 적게 학습하는거임. 전체 데이터에서 3번의 배치만을 학습하는거니까.
- 배치 크기가 1이라면 배치안에 하나의 데이터만 포함하고 있다는거임.
- DataLoader 는 training_args.per_device_train_batch_size 만큼의 사이즈를 고려해서 배치 크기를 만들어서 모델에게 공급하는거임.
max_steps = 3

trained_model_name = f"lamini_docs_{max_steps}_steps"

# output_dir: 모델 체크포인트와 출력 파일을 저장할 디렉토리 경로를 설정하는 코드
output_dir = trained_model_name

# TrainingArguments 객체를 생성하여 학습 관련 설정을 포함시킨다.
training_args = TrainingArguments(

  # Learning rate
  # 학습률은 모델이 가중치를 업데이트하는 속도를 결정함.
  learning_rate=1.0e-5,

  # Number of training epochs
  # 에포크는 전체 데이터셋을 한 번 학습하는 단위를 의미한다.
  num_train_epochs=1,

  # Max steps to train for (each step is a batch of data)
  # Overrides num_train_epochs, if not -1
  # 최대 학습 스텝 수를 max_steps로 설정한다. 이 값은 num_train_epochs를 무시하고, 지정된 스텝 수만큼만 학습한다.
  max_steps=max_steps,

  # Batch size for training
  # 학습 시 각 장치(GPU/CPU)당 배치 크기를 1로 설정함. 보통 GPU 를 쓰고 있다면 16, 32, 64, 128 이런 숫자로 입력한다.
  per_device_train_batch_size=1,

  # Directory to save model checkpoints
  # 모델 체크포인트와 출력 파일을 저장할 디렉토리 경로를 설정한다.
  output_dir=output_dir,

  # Other arguments
  # 출력 디렉토리를 덮어쓸지 여부를 설정한다.
  overwrite_output_dir=False, # Overwrite the content of the output directory

  # 학습 중 진행 표시줄을 사용할지 여부를 설정한다.
  disable_tqdm=False, # Disable progress bars

  # 평가를 수행할 업데이트 스텝 수를 120 으로 설정한다.
  # 학습 중에도 주기적으로 평가를 한다고 함.  120으로 설정하면 120 스텝마다 평가를 함.
  # 평가를 하는 이유는 학습이 잘 진행되고 있는지, overfitting 이 발생하거나 underfitting 이 발생하는지 확인하기 위함임.
  eval_steps=120, # Number of update steps between two evaluations

  # 모델을 저장할 스텝 수를 120 으로 설정함.
  # 이건 학습 중간 상태의 모델을 저장하기 위함임.
  save_steps=120, # After # steps model is saved

  # 학습률 스케줄러의 워밍업 스텝 수를 지정함.
  # 초기 학습률을 점진적으로 증가시키기 위한 것.
  warmup_steps=1, # Number of warmup steps for learning rate scheduler
  per_device_eval_batch_size=1, # Batch size for evaluation
  evaluation_strategy="steps",
  logging_strategy="steps",
  logging_steps=1,
  optim="adafactor",
  gradient_accumulation_steps = 4,
  gradient_checkpointing=False,

  # Parameters for early stopping
  # 학습 종료 시 최고의 모델을 로드할 지 여부를 설정한다.
  # 주기적으로 모델을 평가하는데 평가에서 가장 좋은 모델을 가지고 온다는거임.
  load_best_model_at_end=True,

  # 저장할 체크포인트의 최대 수를 1로 설정함.
  save_total_limit=1,

  # 최고의 모델을 결정할 평가 지표를 "eval_loss" 로 설정함.
  metric_for_best_model="eval_loss",

  # 평가 지표가 높을수록 좋은지 여부를 설정함. False로 설정하여 낮을수록 좋은 것으로 간주한다.
  greater_is_better=False
)

# 모델 연산량 및 메모리 사용량 계산을 위한 것.
# 모델의 부동 소수점 연산량을 계산한다. 입력 크기와 그라디언트 누적 스텝 수를 기반으로 계산함.
model_flops = (
  base_model.floating_point_ops(
    {
       "input_ids": torch.zeros(
           (1, training_config["model"]["max_length"])
      )
    }
  )
  * training_args.gradient_accumulation_steps
)

print(base_model)
print("Memory footprint", base_model.get_memory_footprint() / 1e9, "GB")
print("Flops", model_flops / 1e9, "GFLOPs")

trainer = Trainer(
    model=base_model,
    model_flops=model_flops,
    total_steps=max_steps,
    args=training_args,
    train_dataset=train_dataset,
    eval_dataset=test_dataset,
)

training_output = trainer.train()
훈련한 모델을 저장하고 불러오는 코드:
save_dir = f'{output_dir}/final'

trainer.save_model(save_dir)
print("Saved model to:", save_dir)

finetuned_slightly_model = AutoModelForCausalLM.from_pretrained(save_dir, local_files_only=True)

finetuned_slightly_model.to(device)
짧게 훈련한 모델을 추론해서 성능을 보는 코드:
- 이 모델은 짧게 학습을 해서 성능이 좋지는 않을거임
test_question = test_dataset[0]['question']
print("Question input (test):", test_question)

print("Finetuned slightly model's answer: ")
print(inference(test_question, finetuned_slightly_model, tokenizer))

test_answer = test_dataset[0]['answer']
print("Target answer output (test):", test_answer)
Data Moderation 에 대해서 살펴보는 코드:
- 파인튜닝한 모델의 성능이 좋지 않을 때 준비한 데이터에서 문제가 있을 수 있음. 이를 확인하느 코드임.
- Moderation 과정은 데이터셋을 검토하고 필터링하는 과정을 말한다. 올바르지 않은 데이터는 파인튜닝할 때 안좋은 응답을 내뱉을거임.
- 파인튜닝에 사용할 데이터는 얼마 없으니, 사람익 검토하거나 LLM 이 검토하도록 하면 될듯.
count = 0
for i in range(len(train_dataset)):
 if "keep the discussion relevant to Lamini" in train_dataset[i]["answer"]:
  print(i, train_dataset[i]["question"], train_dataset[i]["answer"])
  count += 1
print(count)
Lamini 를 이용해서 학습하고 평가하는 코드:
model = BasicModelRunner("EleutherAI/pythia-410m")
model.load_data_from_jsonlines("lamini_docs.jsonl", input_key="question", output_key="answer")
model.train(is_public=True)

out = model.evaluate()

lofd = []
for e in out['eval_results']:
    q  = f"{e['input']}"
    at = f"{e['outputs'][0]['output']}"
    ab = f"{e['outputs'][1]['output']}"
    di = {'question': q, 'trained model': at, 'Base Model' : ab}
    lofd.append(di)
df = pd.DataFrame.from_dict(lofd)
style_df = df.style.set_properties(**{'text-align': 'left'})
style_df = style_df.set_properties(**{"vertical-align": "text-top"})
style_df
6. Evaluation and iteration
Model 을 Evaluation 하는 방법은 여러가지가 있음:
- Metric 을 이용해서 평가하거나
- Elo comparision 을 이용해서 두 모델의 성능을 비교해서 랭킹을 매겨서 파악하는 방법
Metric 도 여러가지 있음:
- ARC: 초등학교 수준의 질문 세트
- HellaSwag: 일반 상식에 대한 질문
- MMLU: math, history, science, law 등의 분야에 대한 질문
- TruthfulQA: LLM 의 답변이 얼마나 사실 위주인지에 대한 지표. 허위로 꾸며내지 않았는지를 판단하는 지표임.
Fine-tuning 하기전에 Error analysis 과정을 통해서 우리의 모델의 약점을 파악해보는 것도 좋음:
- 약점을 파악해서 어떤 데이터를 좀 더 신경써서 파인튜닝할 지 결정해볼 수 있음.
- 대표적인 약점은 Misspelling (스펠링 틀리는 것), Too Long (너무 길게 답변하는 것), Repetitive (답변을 반복하는 것)
Evaluation 을 하는 실습 코드:
- 데이터셋을 돌려보면서 Answer 과 Model 이 만들어낸 답변을 수집하는게 중요
- 평가를 위해서는 model.eval() 메소드를 통해서 모델을 평가 모드로 전환해야한다. 이렇게 하면 모델이 학습 과정중에 사용했던 동작 (드롭아웃, 배치 정규화) 등을 비활성화 해서 일관된 추론을 할 수 있음.
- 여기서는 단순하게 is_exact_match() 함수를 통해서 모델의 출력이 답변과 동일한지만 따지고 있지만 실제로는 BLEU, ROUGE, METEOR 와 같은 메트릭을 사용한다.
import datasets
import tempfile
import logging
import random
import config
import os
import yaml
import logging
import difflib
import pandas as pd

import transformers
import datasets
import torch

from tqdm import tqdm
from utilities import *
from transformers import AutoTokenizer, AutoModelForCausalLM

logger = logging.getLogger(__name__)
global_config = None

dataset = datasets.load_dataset("lamini/lamini_docs")

test_dataset = dataset["test"]

model_name = "lamini/lamini_docs_finetuned"
tokenizer = AutoTokenizer.from_pretrained(model_name)
model = AutoModelForCausalLM.from_pretrained(model_name)

def is_exact_match(a, b):
    return a.strip() == b.strip()

model.eval()

def inference(text, model, tokenizer, max_input_tokens=1000, max_output_tokens=100):
  # Tokenize
  tokenizer.pad_token = tokenizer.eos_token
  input_ids = tokenizer.encode(
      text,
      return_tensors="pt",
      truncation=True,
      max_length=max_input_tokens
  )

  # Generate
  device = model.device
  generated_tokens_with_prompt = model.generate(
    input_ids=input_ids.to(device),
    max_length=max_output_tokens
  )

  # Decode
  generated_text_with_prompt = tokenizer.batch_decode(generated_tokens_with_prompt, skip_special_tokens=True)

  # Strip the prompt
  generated_text_answer = generated_text_with_prompt[0][len(text):]

  return generated_text_answer

test_question = test_dataset[0]["question"]
generated_answer = inference(test_question, model, tokenizer)

n = 10
metrics = {'exact_matches': []}
predictions = []
for i, item in tqdm(enumerate(test_dataset)):
    print("i Evaluating: " + str(item))
    question = item['question']
    answer = item['answer']

    try:
      predicted_answer = inference(question, model, tokenizer)
    except:
      continue
    predictions.append([predicted_answer, answer])

    #fixed: exact_match = is_exact_match(generated_answer, answer)
    exact_match = is_exact_match(predicted_answer, answer)
    metrics['exact_matches'].append(exact_match)

    if i > n and n != -1:
      break
print('Number of exact matches: ', sum(metrics['exact_matches']))
lm-evaluation-harness 라는 평가 도구를 사용해서 특정 언어 모델을 평가할 수 있다.
- 중요한 건 우리가 원하는 작업과 연관된 작업을 평가하는게 중요함.
m-evaluation-harness/main.py명령을 통해서 파이썬 스크립트를 실행함.- 이 코드는
lamini/lamini_docs_finetuned모델을 이용해서 ARC 지표에 대해 평가하는 작업임.
!python lm-evaluation-harness/main.py --model hf-causal --model_args pretrained=lamini/lamini_docs_finetuned --tasks arc_easy --device cpu
7. Consideration on getting started now
Fine-tuning 을 위한 팁:
-
- Figure out your task
-
- Collect data related to the task's input/outputs
-
- Generate data if you don't have enough data
-
- Fine-tuning a samll model (Small Model 이 더 효과적으로 파인튜닝이 되기 때문임. 400M ~ 1B 정도를 추천한다고 함)
-
- Vary the amount of data you give the model
-
- Evaluate your LLM to know that'going well vs not
-
- Collect more data to improve
-
- Increase task complexity
복잡한 작업의 종류라면 Model 의 사이즈를 늘리는게 나을 수 있음:
- 일반적으로 Extraction 작업보다는 Expansion 작업이 더 복잡함. 더 많은 토큰을 사용해서 뱉어내야하니까.
- 큰 모델이 더 많은 맥락과 문맥을 파악할 수 있기 때문에 더 복잡한 모델에 적함함.
모델의 사이즈에 따라서 하드웨어 스펙을 대략 정리하면 다음과 같음:

'Generative AI' 카테고리의 다른 글
| What We’ve Learned From A Year of Building with LLMs (0) | 2024.06.11 |
|---|---|
| Building and Evaluating Advanced RAG (0) | 2024.06.10 |
| Generative AI with LLMs: Week 3 (0) | 2024.05.29 |
| Amazon Bedrock을 이용해 RAG, Fine tuning 없이 자동 고객 응대 서비스 구축하기 (0) | 2024.05.27 |
| LLM In Production (feat: Project Pluto) (0) | 2024.05.26 |